
Dr. Tyler Morgan-Wall | 3D ggplots with rayshader | RStudio (2020)
Learn how a single line of code can transform your data visualizations into stunning 3D using the rayshader package. In this talk, I will show how you can use rayshader to create beautiful 3D figures and animations to help promote your research and analyses to the public. Find out how to use principles of cinematography to take users on a 3D tour of your data, scripted entirely within R. Leaving the 3D pie charts in the pantry at home, I will discuss how to build interpretable, engaging, and informative plots using all three dimensions
image: thumbnail.jpg
Transcript#
This transcript was generated automatically and may contain errors.
Without further ado, I'll hand over the stage to Tyler Morgan-Wall.
Hi, everyone. Thank you for coming, and thank you, RStudio, for inviting me to talk. My name is Tyler Morgan-Wall. I'm the developer of the rayshader package. I'm a researcher at IDA in Washington, D.C., and today, I'm going to be talking to you about 3D ggplots with rayshader.
So first things first, what do I hope you get out of this talk? 20 minutes from now, I guarantee that each and every one of you will know how to create beautiful 3D ggplots in just a few lines of code. I also guarantee that this specific capability is so straightforward that you won't have to look up any additional documentation to get started, even though rayshader has a great package and website at rayshader.com with extensive documentation and examples. And finally, I guarantee that by the end of this talk, you'll be thinking to yourself, wow, that guy really loves spinning 3D plots.
What is rayshader?
So what is rayshader? I could start first by describing it in words like a normal person, but luckily, this year, I don't have to. Because I have a great visual aid created by the unparalleled RStudio artist in residence, Allison Horst.
Rayshader is a package designed to create 2D and 3D visualizations in R, specializing in maps. It includes a wide variety of functions, here represented by fuzzy functional monsters that help you build, color, and annotate and beautify your visualizations. Specifically, rayshader uses a technique called raytracing in order to realistically simulate how light falls on 3D models and landscapes. On the left, you can see how rayshader calculates the shadows cast by buildings in Philadelphia using a combination of LiDAR data and the suncalc package to calculate the position of the sun in the sky.
Rayshader can take these 2D maps and then project them into 3D, as we see here on the right. So rayshader also includes functions that you can apply post-processing effects to enhance these 3D maps. Here I've added a depth of field effect to blur areas away from the focal point, as well as a camera vignetting effect to add a subtle darkening around the edges like you'd see in a DSLR. This 3D visualization was created entirely in R with no external software required.
Rayshader does all this with a straightforward pipeable interface where you use elevation data to generate shadows and maps. Here the Hobart object at the top of the chain is simply a 2D array of elevation values at every point. It's just an R matrix. We use that first to generate a color layer, add a water layer, add some shadow layers, and then finally plot the map. To project this map into 3D, we simply replace the plot map function with the plot 3D function and include the original matrix of height values. This function generates a 3D mesh generated by the Hobart matrix and then paints the surface of it with the output of everything above.
Extending rayshader beyond maps
Mapping is great, but one thing I always get when I demo Rayshader is people say, I'd love to have a reason to use that, but I don't work with geographic data. So let's say I wanted to extend Rayshader to work with other types of data. Let's first specify what type of 3D plot we want to work on.
Typically when we talk about 3D plots, there are four common types we're referring to. First is the 3D scatter plot, which is a bunch of points floating in space. Second is the 3D line plot, which is a bunch of points floating in space connected by lines. Third is the surface plot, which is a contiguous mesh of points representing a solid surface. And finally is the abomination, which is what happens when you take a plot that doesn't want to be 3D, but you pull it into the third dimension anyway.
To make sure we don't make any abominations, we'll only use 3D plots when we have three continuous variables, variables we map to the X, Y, and Z directions. We'll also avoid plots that involve data floating in space, as those suffer from the inability of the reader to correctly determine the depth of the points in space, leading to ambiguities in interpreting the data. Surface plots suffer far less from this problem, since the regular grid gives the reader more perceptual cues to the data's spatial ordering.
We will also remove the axes, which might seem heretical in data viz, but axes in 3D don't work the same way they do in 2D. The viewer can't unambiguously map the data back to their values. Putting your 3D visualization in a box rarely improves it, and if a visualization requires the axes to be interpretable, it's likely not a good candidate for 3D in the first place.
Putting your 3D visualization in a box rarely improves it, and if a visualization requires the axes to be interpretable, it's likely not a good candidate for 3D in the first place.
Designing the API: why ggplot?
So we're going to focus on surface plots. What's our interface going to look like? When you're creating a new software package, one good idea before you start is to survey what tools are already out there. This serves two purposes. One, to figure out whether you even need to write your package, whether the niche is already filled. And second, to get inspiration for what your software should, or maybe shouldn't, do.
So what's the premier tool out there for 3D visualization currently? Blender. Blender is a 3D modeling, rendering, sculpting, simulation, visual effects, and everything but the Kitchen Sink software package, open source. It's an extremely powerful piece of software that produces absolutely breathtaking 3D renderings, including 3D data visualizations. Here are a few examples taken with permission from artists and cartographers who use Blender to visualize data with gorgeous results.
There's a few issues, however. First, Blender is primarily a GUI-based application, as you see here, along with the text I have added. And GUI-based workflows are not reproducible. One of the benefits of using R to power your visualization and analysis pipeline is that you can reproduce old analyses years after the fact, rerun the same exact analyses on new batches of data, and make slight changes to figures without having to redo the entire thing. There's a Python interface to Blender, but it's primarily aimed at developers, not at data scientists and analysts. Data is not a first-class citizen.
Additionally, you're here at this conference because you've at least somewhat invested yourself in the R ecosystem. You've taken workshops, read tutorials, and presumably have spent a good deal of time becoming familiar and maybe even an expert in R. And all of those skills will be absolutely useless when it comes to learning Blender, except for maybe robust anger management techniques.
Which, if you saw Jenny Bryan's keynote this morning, you'll know the frustration of seeing Objective-type closure is not subsettable for the first time. So it's a stretch to ask most people to learn one complex piece of software. Learning two to perform a single task makes that task inaccessible to all but the most perseverant of individuals.
So for a surface-plotting API, I have a few goals in mind. First and foremost, you should never have to think about vertices or triangles or polygons. I want a 3D-plotting interface that's focused around data, not computer graphics. Secondly, I want to avoid introducing new interfaces you'll have to learn. I want to use as much as what you already know to lower the barrier to entry for using the software. And finally, I want the interface to be friendly and simple enough that people feel like they can play with it. Because play and experimentation is the fuel for creativity and learning.
And what fills all these requirements? ggplot. It's a plotting library that's data-centric, well-known by many people, and easy to experiment with.
How plot_gg works
So you might be asking, wait, ggplot2 is a 2D-plotting library. Is there a ggplot3 I don't know about? No, but I'll tell you how you can transform into 3D. Recall what I said earlier. To plot a 3D surface, all you need are three variables that we map to the X, Y, and Z directions. The X and Y aesthetics are built into ggplot, and we encode the third aesthetic representing height to color. Then we've encoded all three variables of our 3D surface into our ggplot.
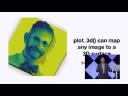
Images are, generally speaking, several matrices just layered together, each which specifies a color intensity. So even an image can be a height matrix, for better or for worse. Sorry, Hadley.
The plot3D function, which performs all the 3D mapping logic, only cares that it's past a matrix of height values in an image. If we encode our data into one of those color layers, we can then extract a matrix of height values from our ggplot and create a 3D surface onto which we can paint our data. By swapping the ggplot's palette to a grayscale black and white palette, it ensures we have a one-to-one relationship between our data and our height value. We then strip out all the non-color elements and non-data elements, axes, labels, backgrounds, text, and our grayscale image now represents a height map of the surface. We then drop this into plot3D along with the ggplot texture, and now we have our 3D ggplot.
You might ask, wait, you guarantee me little to no effort on my part. Stripping out all these theme elements seems like a lot of effort, and it is, which is why I automated the entire process into a single-function plot gg. You just pass in the ggplot object, and it transforms it into a 3D surface, no other work required. No drawing polygons, no fiddling with complex GUIs, just one simple API to call, drop in your ggplot, and watch it grow.
PlotGG works with both the color and fill aesthetics, and RayShader automatically detects which one you used. Here I used the color aesthetic in a point geome, which is then projected to 3D. If you have a complex plot that uses both, you can specify in PlotGG which one to use.
Animating and enhancing 3D plots
So 3D plots are best seen in motion, and RayShader includes several functions that you can use to bring your viewers on a tour through your data. You can use the render camera and render movie functions to pass a series of camera angles to swing around your data set, so you can zoom in, around, and save your movie to a file to share online or with a loved one.
So you can also use render snapshot function to take a picture at the current orientation, but if you want the user to focus or the viewer to focus on a certain area, you can use the same trick cinematographers use when they want to direct a viewer's attention in a movie. Use depth of field to pull focus onto the area of interest with the render depth function.
You can also add titles and image overlays when taking snapshots and rendering movies. Here I added a title to describe this plot, which is the classic Public Health London cholera data set, here visualizing the number of nearest neighbors at infection sites. So I added this legend as an overlay to clearly label the number of nearest neighbors. I also used the render label function in Ratiator to add a floating text label at the site of the water pump where the infection site is being spread from.
Some might say that it's improper to map the same variable to two separate aesthetics. This visualization is showing the number of measles cases in the world reported by the WHO mapped to both color and height, which is a redundant mapping. But redundancy can be good because it can improve the accessibility and interpretability of our plots. 3D plots have some downside. Data can obscure other data behind it. The use of perspective can make comparisons between data points harder if there's a lot of spatial variation in depth, and the users generally lose the ability to pull out the exact values of the z-axis.
However, it also has some perceptual advantages over color. Color perception varies from person to person, so what might be an obvious difference between one person might not be to another. And additionally, how our eyes interpret color is highly nonlinear. And even if you pick a good palette like those in the Viridis package, as we have here, readers have to understand how to read and reference a color bar, which not all people do. 3D plots make it easy to spot outliers and make rough relative comparisons between values. Using both color and height can get you the best of both worlds.
And if you have a truly complex visualization where the 3D surface is actually different than the data you're showing, RayShader allows you to do that as well. This plot is a simulation of a moon disrupting a ring of satellites, visualizing both the motion of the particles as well as the shape of the gravitational potential well. Showing how the satellites are falling into the potential well is far more illustrative than showing both the 2D plots. And creating this visualization was straightforward with PlotGG. Instead of passing in a single GG plot, we just pass in a list of two GG plots. The first is the texture that's painted on the surface, and the second one is used to project it to 3D.
Render high quality: a built-in path tracer
Here you can see it in action along with the beautiful resulting animation. Now, some of you might not be convinced. Because while these plots are cool and the API is simple, they don't have the same visual impact as the plots produced by Blender. And that's true, because Blender has a realistic rendering algorithm called path tracing that can produce photorealistic results, because it actually simulates how light travels through the scene.
RayShader relies on the RGL package for rendering, which uses a faster but less visually striking method called rasterization. In order to get visualizations that look as good as those produced by Blender, I would have to write my own path tracer entirely in R from scratch, integrate it into RayShader, and then get it on the CRAN, which I did.
So introducing render high quality, a RayShader function that calls a built-in integrated path tracer to render absolutely stunning 3D data visualizations. And the API is dead simple. It takes your current RayShader view, or just call the function. It takes your current RayShader view, transparently exports it to a built-in path tracer, and renders it with realistic light transport. No complicated GUIs to learn, no long walkthroughs or tutorials to slog through, no need to even learn how path tracing works. Just create a 3D plot with RayShader, call the function, and see your data in a new light.
Just create a 3D plot with RayShader, call the function, and see your data in a new light.
Speaking of light, you have absolutely full control over how the scene is lit. You can customize the color, direction, intensity, number of lights, as well as drop in your own lights wherever you see fit. You gain full artistic control over how your visualization looks. Here I've added a wandering 3D light traveling at a figure 8 around Hobart, Tasmania. This is all powered by the RayRender package, which I won't get into here because it's an entire talk on its own.
But whether you want to plot a T-Rex or a teapot, bounce the DVD logo exclusively into the corner 100% of the time, create your own gold medal for best Pokemon master, or just render 30 to 50 feral pigs on their own lonely planet, you can do it with RayRender, all entirely within R.
And you can use RayRender with RayShader to add the freedom to add whatever you want to your visualization. Render high quality supports adding 3D models to your 3D RayShader data. If you want to add a pig to your map, well, I'm not going to stop you, and in fact I encourage it. While this particular pig was added just for fun, this capability can be used to augment and enhance the story your visualization is trying to tell.
Let me show you how you can combine all of these capabilities all into one awesome example. Here, we start with a regular RayShader version of the space-time plot I showed you earlier. A nice 3D view, but we can do better. We're using RenderSnapshot to capture frames for our movie, but let's switch to RenderHighQuality instead. That gives us beautiful ray-traced shadows and realistic light transport. But let's go one step further. We can use RayRender to pass in additional objects into RenderHighQuality, here to drop an actual 3D planet, moon, and asteroid belt into the visualization, and we can animate it. This is all done entirely within R, simulation, plotting, and rendering, so it's entirely reproducible.
Summary and resources
So in summary, transform your GG plots into 3D using RayShader. Feel free to experiment with PlotGG and see what you come up with, and if you come up with something cool, be sure to post it on Twitter with the hashtag RayShader, hashtag rstats. If you want to impress your peers and show how R is truly the coolest language for 3D visualization, take RenderHighQuality for a spin. For more information, documentation, and examples, check out RayShader's website at rayshader.com, RayRender's website at rayrender.net, my own personal blog with some very in-depth examples at tylermw.com. Get the code and check out my master class on GitHub, and find me during the rest of the day to get a RayShader hex sticker, and check me out on Twitter at tylermorganwall for a constant stream of awesome 3D visualizations and updates. Thank you both so much.
Q&A
Thanks so much, Tyler. I think you just covered the most popular question, which is, where can we get the RayShader hex sticker? Just find me. I think we have about 200 left.
Is spinning the default behavior of the 3D plots, or can we click and drag to explore different stationary angles? Yes, you can click and drag. RGL, you can just click. Spinning is just one of the options in RenderMovie, so you can change the camera angle to whatever you want.
Do we need a fancy graphics card? No. Not at all. It should work on whatever computer. It doesn't use your GPU at all.
Is RayShader compatible with Shiny slash Flex Dashboard? So there is a way you can use it. You can export it currently to a WebGL object, which you can then render in. There are some Shiny apps that show this. One of the projects I have for the next year is I've already included a GLTF export in the dev version I have. That I'm going to include as an export. That's a web-transmittable format. So I'm going to have that. And the other issue with Shiny is if you're running it on a server, RayShader currently uses RGL, which doesn't support headless operation, so you can't take snapshots. But that's something I'm also working on.
Can layers be added to RayShader maps, such as roads or structure? Yes. So there's an add overlay function. Watch my talk from last year. But yes, there's an add overlay function, and there's a great package called GeoViz, which allows you to add floating lines for movement tracks, paragliding tracks, GPS tracks. A lot of people have done some very cool stuff with that.
Does RayShader play well with GGAnimate? No. That's also a future plot, a future goal.
RayShader scientists spend a lot of time asking if they could. Did they also ask if they should? Yes. So go to my blog, read my blog post where I talk about 3D GG plots with RayShader. And I do talk about some of the thoughts for why I think that 3D can be good. I think one of the issues with 3D is really it's more been about the tooling hasn't supported it through the years. So I think that's a key part that's been missing. So when the tooling mostly supports 3D pie charts, you're going to get a lot of bad plots. But if the tooling supports something better, then I think that's what I'm trying to do at least.
How long does it take for the movies to render? So when I'm doing the non-ray traced and path traced ones, they're pretty quick. You can get one of those in under a few minutes as long as it's not too large. The ray traced ones, well, my computer sits at 100 C the entire for like eight hours straight. It's probably not good. It's going to kill my computer. So yeah, it depends on the quality though. You can adjust the number of samples to get a lower quality if you just want to demo something out. But when you render something with a path tracer, it's like six to eight hours for a 12 second video. So yes, a long time.
And then last one is, where can we find good 3D geospatial data to practice with? So if you go to my master class, I actually have five data guides that list data for the entire world, the US, several cities. It gives you instructions on how to extract height data from LiDAR, which includes buildings. And I give you very, very detailed instructions on exactly what to click and how to get the data so you can easily create whatever map you want. Well, let's have another round of applause for Tyler.