
Shiny Gadgets with R | RStudio Webinar - 2016
This is a recording of an RStudio webinar. You can subscribe to receive invitations to future webinars at https://www.rstudio.com/resources/web... . We try to host a couple each month with the goal of furthering the R community's understanding of R and RStudio's capabilities. We are always interested in receiving feedback, so please don't hesitate to comment or reach out with a personal message
image: thumbnail.jpg
Transcript#
This transcript was generated automatically and may contain errors.
So what we're going to talk about today is a new way to use Shiny that we at RStudio have called Shiny Gadgets. And Shiny Gadgets are a tool that you as an R developer can use yourself or give to other R developers. They're a way to apply the interactivity that Shiny provides to a new set of users, people who program in R.
And to begin this, let's talk about what a gadget is in contrast to what a Shiny app is. I noticed from the poll that about a third of the people here haven't used Shiny, so I'm actually going to spend a little more time talking about Shiny than I thought I would. And that's the sort of great feedback that I'm glad the polls can provide for us.
If you've used Shiny, or if you haven't used Shiny before, Shiny is an R package that allows you to create web apps with R. And the use case for Shiny would be that you have some sort of data or simulation or model that you want to fit using R. R is really good for that. But you want to make it available to people who, A, might not have R, might not know how to code in R, and might just want to get to it easily and do the things they could do, like type on a keyboard or click their mouse, to control what happens in the app.
And that's what Shiny does. It builds a web app from R. Your users get to visit that app over a network. The web app is essentially a web page, so any network that can serve up a web page, you can put the app on and viewers can look at it. You can also keep your web apps local and just look at them on your own computer. But the idea behind Shiny is you're packaging your results in a way that someone who doesn't know R can access easily and use easily.
And if you are completely unfamiliar with Shiny, which I doubt is the case, but if you've never even heard of Shiny before, you could go to the RStudio.com website. We have a showcase of Shiny apps there that you could play with and get a sense of what Shiny does.
What makes a Shiny gadget different
So that was the motive for creating the Shiny package. It's a very, very popular package. What we're going to talk about today is a way to use this package and do something a little different. Instead of creating a web app that you then serve over a network to people who don't have R and aren't interested in using R, you can use Shiny to create an interactive tool that is loaded locally in an R user's R session that they can use to do interactive things. We're calling these tools that stay in your R session Shiny Gadgets.
And I have prepared a demo of a Shiny Gadget to make it clear what we're talking about.
So this is my RStudio session. You see I have some scripts loaded up here and there's some files in my directory. These are the files that I'll be putting on GitHub after the webinar. And the first file here is called GetPassword. It loads a couple of libraries, loads a couple of packages, including the Shiny package, and then defines a function called GetPassword. If I were to source this, that function would be defined. You can see over here in my environment it now exists, GetPassword. And if I wanted to run that function, I could do so.
And this function is unique because what it does when you run it is it calls a Shiny app or what I'm going to call a Shiny Gadget. So here I'm running the function. It opens this window. This window is a Shiny app or a Shiny Gadget. It has a field here that I could type in. It has some buttons that I can click. And this is right here in my local RStudio session.
The idea behind this particular gadget is I could type in a password here. So let me type in a password. You can't see it. It's a password field. But then when I'm done using this gadget, I can click the Done button, and the gadget will return what I've typed to my RStudio session or my R session. So I click Done, and then we see down here at the command line, this is the password I typed in, hello world. And it's returned right to the R environment that I called GetPassword from.
Now in this case it's called GetPassword from the top level, but in R you can call a function from another function. You can save the results to a variable and so on. So I can use GetPassword inside other R code. When that code gets to GetPassword, it will launch the Shiny Gadget. The user can type in their password with the gadget. I can arrange to have that saved and then used by the function I called GetPassword, perhaps to log into a database or whatnot.
What I would have achieved is an interactive way for my users to type in passwords required by the code that they're running. Not just that, this format of typing in passwords here has some advantages because the actual password to connect to the database or do whatever I'm going to do with that password doesn't need to be hard-coded into my code. So I can show this code on GitHub and not worry about security issues. When the code's run, that's when the password will be typed in and so on.
But the gadget aspect of this is it is a function that calls a Shiny app locally, and then once your user uses a Shiny app, the Shiny app passes values back to the function that called it, or the R environment that called it, that your code can then go on and use.
But the gadget aspect of this is it is a function that calls a Shiny app locally, and then once your user uses a Shiny app, the Shiny app passes values back to the function that called it, or the R environment that called it, that your code can then go on and use.
So if we compare that to Shiny apps as you may have used them in the past, you can see a gadget is used more in line with other types of programming. It's part of the programming process for the user, where Shiny apps are used normally to communicate results or to make simulations or models accessible to a wider audience. Gadgets are run in your local R session to go pass results back into that R session, where Shiny apps are designed to be self-contained and to run on a network later when you, the R developer, aren't keeping an eye on things.
And then Shiny gadgets are invoked from functions. They're always called by an R function and then they appear, whereas Shiny apps are deployed on a server and they sort of wait there on the server until someone visits a web address, and then the server loads up the app and the person gets to see it when they want to see.
So if you were to think of the main difference between Shiny gadgets and Shiny apps, Shiny gadgets are much more for the R developer, where Shiny apps are much more for your audience. In fact, you could say that Shiny gadgets are for data scientists, and Shiny apps are for, you know, we could be nice and call the people who use them decision makers, but maybe they're just the people you want to communicate your results to.
In other words, Shiny gadgets give you a chance to be like, you know, in the 1980s we had this hair club for men. When you use a Shiny gadget, you're not just a Shiny developer, but you're also a Shiny client.
The potential for this interface with Shiny is pretty large. You could just use your imagination to imagine things that you do with code that actually isn't very easy to do in an iterative code fashion. But then if you made that interactive with a Shiny gadget, you could do it much more quickly, or your users could do it more quickly. So think of things like cleaning data and checking for outliers, or filtering data, or just picking nice colors for your graphs. They're a little hard to do at the command line, but you could do easily with a Shiny gadget. And by putting that gadget into your code, you make that more a part of your reproducible workflow, even though it is something that you're kind of doing spontaneously on the fly.
Three essential features of every gadget
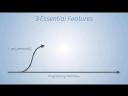
So the gadget that I showed you guys is called Get Password. It looks sort of like this, and I'm going to use it as a quick run-through of what you need to know to make your own Shiny gadgets. There are three essential features for every gadget. We'll look at them quickly with Get Password, and then I'll show you a more complex gadget that will allow us to go into the details.
But the way to think of these features is gadgets are used in the context of a programming workflow. If you want to interrupt that workflow and get into a gadget, then come back into that workflow with the results of the gadget, you're going to first need to create a way to access the gadget. And that's going to be by writing a function that calls the gadget. So here for Get Password, that function is Get Password. That's pretty simple to do. I'll show you how to do it, but it's just writing a function.
Next, you need to actually create the gadget experience that your user gets. This is similar to any Shiny app where you lay out a UI, but we've created a new package that can help you make gadgets specifically because gadgets are a little different than other Shiny apps, and I'll show you what that means in a second.
And finally, after your user has used the gadget, you'll want to have a way to take what they have input into the gadget and put it back into your programming workflow where it can then be used by other functions. And you'll do that with a function called StopApp, and we'll look at that as well.
If we were to scan quickly the code for Get Password, you could see all these things showing up there. Get Password is a function. I saved it as a function, I defined it as a function, and I invoked it by calling the function. The UI of this Shiny app is made with these new functions that you might not recognize if you're a Shiny developer because they come from the mini UI package. And then I'm using a special function called StopApp to handle what I want the app to do when the user closes the app. And this is the step where the input that's been given to the app will get passed back to the code that called the app.
The PickPoints gadget demo
So to illustrate these things, and to illustrate some of the options and flexibility you have around them, I have a more sophisticated app, which I will save in the GitHub repository in the R script brush underscore gadget dot R. And I have it open in my RStudio session right here. Here's the code that makes the app. Let's first try out the app to see what it does.
So I'm running PickPoints, which is the function that saved the gadget. It opened over here my viewer window. And what you can see is this is a scatter plot of the empty cards dataset with the weight variable on the x-axis, the mpg variable on the y-axis. And that comes from the way I called PickPoints. I said, you know, here's my dataset, here's the x-axis, here's the y-axis variables. And the reason this syntax follows is because of how I wrote this function.
Now that I have the scatter plot of points here, I could use the gadget to select actual data points in the data by highlighting them with some brushing, using Shiny's interactive graphics brushing capability. Then I could tell the gadget with these buttons down here, throw out these points, I don't really want to use them, then they become a light gray. Maybe I could throw out some more points. Maybe I decide I actually do want to use these two points, so I say, you know, put those points back into play. Or I could, using this gadget, make all the points disappear so I can just select the ones I want one at a time. Or if I've gotten too far and messed up, I'll just reset it all and start again.
What happens when you click done for this gadget is all the points that are still highlighted will be selected. Well, to be completely accurate, the gadget's going to return a vector of true and falses that can be added to our dataset of two cars. Every point that's highlighted here in the gadget, every point that I've selected, will have a true, and every point that I haven't selected will have a false. So when I click done, we can see I get this vector back.
And if I wanted to be more, you know, maybe to drive a point home, if I wanted to use this later, I would save it to something. So now I'm going to invoke the gadget again. I'll select a few points again, click done. Now this time, I've saved the results. You can see selected appears up here in my environment. And I can use this in code. If I wanted to get those actual points, I could subset empty cars with selected. Those are the points that I ended up highlighting in that gadget.
Walking through the gadget code
So you can see what this gadget does, and hopefully you can see, you know, this might actually be a useful task. So let's use the code in the gadget to get a better sense of how we made the gadget. And we're going to have to think about those three steps, how to call or invoke the gadget from our programming workflow, what user experience the user has inside the gadget, and then how to return results back to the programming workflow.
The way that we call a gadget, as I said earlier, was we would save it as a function. So here I'm creating a function called pick points. I'm literally just using R's function to do this. And down here, you know, I'm closing the function. Since I'm writing a function, I could set any arguments that I want for the function. So here I chose three arguments, data, x, and y. And wherever these arguments or symbols appear in the body of the function, R will substitute in whatever the user passes as data for data in that place. So here I have data. This will be the data set the user selects. The past example is empty cars. And same for x and y.
Now what's inside that function is important. First I'm creating a UI object and then a server object. If you're new to Shiny, you should know that these are the two objects that you have to create to create a Shiny app. If you've already created Shiny apps, then you recognize what I'm doing here is I'm creating the UI for a Shiny app and the server logic for a Shiny app. For a regular Shiny app, you would create these things and save them, and then you'd call runApp or a similar function to load that app. What we're doing here is we're creating the objects, and then we're calling runGadget as the last line of the function with those objects UI and server. What runGadget does is it launches the gadget, and it's the last line of the function. So the gadget is what's returned from the function, and what this gadget itself is going to return is the values that we tell it to return when someone clicks Done.
In terms of setting up your gadget, it's just like setting up a Shiny app with UI and server, and then use runGadget instead of runApp to launch it. That's how we could invoke the gadget from the programming workflow.
The miniUI package
Now let's look a little at the user experience for this gadget. You could see that I'm loading the package MiniUI here for this gadget. The UI functions in the gadget come from MiniUI. If we look at the MiniUI package, you can see it's actually a fairly small package. We developed this to work alongside Shiny for making Shiny gadgets, and it has a few different pieces of Shiny layout that you can use.
The reason we thought it would be important to develop a new package for gadget layout versus a Shiny app layout is that most gadgets tend to be very small. The space that you use on the screen when you make your gadget is normally limited to either your RStudio viewer pane, or you might have a pop-up window or something.
If you picture the dashboard over here on the left, we fit all sorts of stuff in there. We conceivably have our user's whole computer screen to work with, but then if you look at the gadget, which tries to fit the same elements into the space that a gadget would appear in, it's too jumbled. There's too much going on in there. Also, there's elements of Shiny layout that try to resize things automatically and create a fluid layout that don't really apply to Shiny gadgets. MiniUI provides a way to fit elements concisely into a small space, utilizing all the space available at the same time as possible, so everything fits into your gadget.
The main function for the MiniUI package is MiniPage. It takes the place of FluidPage, and what it does is it arranges to have a Shiny gadget that fills up the whole space. There's some extra CSS involved in doing this, and so the things that go into MiniPage need to expect the sort of CSS tweaking that MiniPage is using to take advantage of that space, which means you tend to only put into your MiniPage elements from the MiniUI package, like MiniTabPanel, MiniTabStripPanel, and so on.
However, you want to have plots in your gadget. You want to have things that you'd put in a normal Shiny app. These aren't things designed specifically to use MiniUI. MiniUI came about later. We do have MiniContentPanel, which acts as a bridge between the things like a plot output that you'll show in your UI and the special MiniUI that takes advantage of the space. Anything you put in MiniContentPanel will be fit into the space in an appropriate way, and as your user resizes the space or whatnot, it'll work out well. Here I've put plot output inside MiniContentPanel.
The other things in the UI that you'll want to know about are almost every gadget has a gadget title bar at the top of the page. This is a very concise way to label the gadget. Here I'm calling it Shiny Gadget Example. It automatically inserts a Cancel button and a Done button. The Cancel button lets your user lock out of the gadget should they not want to be there for some reason. It'll return, by default, an error, a user error. When someone cancels a gadget, the gadget doesn't really know what to return to the programming workload. You can intervene and override what happens when someone clicks the Cancel button if you want. The Done button saves. It's an action button. It saves its result as input dollar sign Done, and it's up to you to decide what happens when someone clicks on Done. That'll be the next thing we talk about.
We talked about MiniContentPanel. This is just how you put regular input into your MiniUI. But then some interesting things that you might use to create features in your app are MiniButtonBlock. We've seen this with our app. What it does is it gives you a chance to add various buttons to the bottom of your block. These would be action buttons. You can control what they do.
Alternatively, you could add a TabStripPanel. This is similar to a TabPanel in the Shiny app, where each of the icons here at the bottom of the panel, when clicked, opens up a new tab in the content of the panel. I have an app that demonstrates what this does. Go back to RStudio.
The Tabs app uses a MiniTabStripPanel. To use MiniTabStripPanel, you have to create MiniTabPanels for each button in the app. Let me source this and then just run it. This app is all pure demo. It doesn't really have a logical function. When the Parameters button is clicked here, we have this slider in the app. We have our gadget title bar at the top. If we look at how we're calling MiniTabStripPanel, the first TabPanel contains its own MiniContentPanel that has the slider that we see. It has its own name parameters. That name appears down here. Then I've used the icon feature with the icon function to add a sliders icon to appear above the parameters to make this a little more visual. Since we're working in such a small space, this is a great chance to take advantage of the phrase, a picture is worth a thousand words. Whenever we can make things graphical here, it can convey a lot of information with a small amount of space.
The next MiniTabPanel is called Visualize. We see it here. It has an area chart icon. The names of these icons, you might recognize, are coming from Font Awesome. If I click on Visualize, it opens a new tab in the center here. Now I have a graph. Map and Data do the same things. Data is actually an HTML widget that we put inside our app. There's some other layer of interactivity here in this app. Map demonstrates a button block here. It has a button block with a single button. The way I did that is I added MiniButtonBlock into the TabPanel for the Map tab. First I have my content. Then I have my button block. I put an action button in there. It's called Reset.
Before we move on, those are just a few building blocks to work with. But you can combine them to make sophisticated gadgets. There's really not so much more you'd want to do to a gadget, so this will take you quite far. If we go back to the Help menu, you can see that there's really not much else in this MiniUI package. The other functions here handle the actual bars that are added by default to your gadget title bar.
If we stop that app, if we were to look at gadget title bar, you can see that it does have some defaults that are using the tab completion. You can see it's calling these things by default, so you don't have to. But if you wanted to overwrite, for example, the word done in the done button, then here for the right argument, you'd actually spell out the right argument and choose your own title.
Stopping the app and returning values
All of that's actually probably pretty familiar to you, especially if you're a shiny developer. I'm going to take it for granted that you've been writing our functions and that you've been creating UI and server, because that's what you do as a shiny developer. But this step might be new to everybody involved. That's stopping an app and returning values back out of the app. You can do this with a regular shiny app, but it really becomes essential when you use a shiny gadget. It revolves around a function called stopApp.
To take advantage of stopApp, you do need to know how to use observeEvent, which is a shiny function for handling events. The way observeEvent works is you call this in the server logic of your function. Just like you'd make a reactive expression or set up an observer or a render statement, you would set up an observeEvent block. There's two observeEvent blocks, one for each of the buttons here. What observeEvent does is it sets up an observer that watches a reactive input.
Every shiny gadget is going to save input$cancel and input$done as inputs for the two buttons in the title bar, unless you intervene in naming something different. These two observeEvents are going to watch those buttons and wait to see when their values change. Action buttons have an arbitrary value that increments by one every time someone clicks the button. When someone clicks that button, that value will change. These observeEvent statements will notice that that has changed. The next part of the observeEvent call is a code recipe that observeEvent should run whenever the first value changes. Here, when input$done changes, observeEvent is going to run this code, stopApp.
What stopApp does is, first, it exits the app. It closes the app. Then, second, it passes to the environment that called the app anything that you put as arguments for stopApp. If you put multiple things here, you could create a list for stopApp to return. Here, let's assume that this app created vowels$keep. Perhaps that's a reactive expression. Perhaps it's a static value. stopApp is going to return a non-reactive copy of it. It will be the current value of vowels$keep when the app is closed, when the user clicks done. This is the trick for delivering values collected by your app to the code that called the app. If that code stored those values into an object, they'd immediately be stored there. You could proceed as a regular R developer using that object.
If we look here in our Brush Gadget app, you can see that I have set up down here some observeEvent statements. These observeEvent statements are calling stopApp. When someone clicks done, it's actually going to stop the app and return vowels$keep, which is something I set up to be that list of trues and falses that express which values have been selected. If someone calls in and puts vowels$cancel, then I've arranged for this app to just stop and return null instead of returning an error.
Viewer options for gadgets
I want to take you into an application of Shiny Gadgets. I'll get to that in a moment, but there's one last thing that I realize now I've brushed over that I would like to draw your attention to. I think Shiny Gadgets are pretty simple. We've had half an hour, and we've covered almost everything that are in them. This is just the last topic.
You may have noticed, for example, when I run this app, it appears down here in the viewer pane. But when I ran the getPassword app, it appeared in a dialog box. It sort of floated above the screen right there. You can also arrange for your gadget to appear in your user's browser. The way you do that is with the runGadget function here. When you call runGadget, by default, it's going to create a gadget that appears in the RStudio viewer pane. But you could set runGadget like I did in the getPassword box. You set the viewer argument of it to dialogViewer. That would make the gadget appear in the dialog box like we saw before. You could also alternatively set this to browserViewer. dialogViewer needs a title. Its box is going to pop up, so we need to give it a title to explain the box. But the other browser viewer doesn't need that.
I resource this. GetPassword. Now it's opening my browser, and here I have the gadget in this experience. Then if I wanted that in the viewer box, I would leave that in the paneViewer. Or I'd leave viewer blank because this is the default. Resource that. GetPassword. Here I have it over in the paneViewer. So these three viewer functions are how you control where the gadget pops up.
RStudio add-ins
Alright, so those are gadgets. What you use your gadgets to do and how you combine these pieces to shape the user experiences is really up to you, your experience, and your imagination. But once you've created a gadget, there is something a little further you can go, a place you can go further with the gadget that might be interesting, so I wanted to cover it here in this webinar. And what I'm talking about is something that we're calling RStudio Add-ins.
And the idea here is with your gadget, you let your user leave the programming workflow temporarily by calling a function here, GetPassword. But you can make that even more seamless by giving them a GUI way to access your gadget. Instead of calling the function, they can actually access the gadget from the Add-ins menu that is already in RStudio.
So if you have a recent version of RStudio, definitely version 1 or higher, you will have this Add-ins box up here. What appears in the drop-down menu next to Add-ins will depend a little about what packages you have and whatnot, but this is a place that collects Add-ins. Add-ins are essentially shiny gadgets that have been built into the UI of RStudio IDE. So you can see I already have GetPassword listed here as an Add-in, and if I were to click on that, it would open up this GetPassword box, and then if I type in my password and click Done, that will get returned, in this case, to the command line because of the way this Add-in is written.
If I wanted to, if this is something I find myself doing a lot, I could go to Browse Add-ins and then Keyboard Shortcuts, and actually set up a keyboard shortcut so I don't even have to click the Add-ins drop-down menu to use this Add-in, and use the keyboard shortcut and so on. So these are just ways to make it even easier to access shiny gadgets when you're using R.
The way to make an Add-in involves a package. So Add-ins are shared through packages. You create your shiny gadget, which you recall is going to be an R function. You save that R function in a package, and then you register that function as a gadget by creating a file in this folder in RStudio Add-ins.dcf. This is a folder in your package, and for each Add-in you want to create, you fill out these three fields, Name, Description, Binding, Interactive. And then whenever a user installs that package, this Add-in will be added to their list of Add-ins.
The way to make an Add-in involves a package. So Add-ins are shared through packages. You create your shiny gadget, which you recall is going to be an R function. You save that R function in a package, and then you register that function as a gadget by creating a file in this folder in RStudio Add-ins.dcf. And then whenever a user installs that package, this Add-in will be added to their list of Add-ins.
So let's take a look at how that can work. We have this Add-in here, it's git password.
If you want to make a package, some of you probably got nervous when I said you have to make a package. It's not that difficult to make a package, especially with RStudio. We can make a package right now. The easiest way to make a package is go to New Project, select a new directory, and then tell RStudio you want that new directory to be in R package. I'll put on the desktop, and I'll give a package a clever name, foo. And if you want to start with any functions in your package, you could do that by going to the Add button right here in this pane. And here I'm going to add the git password function to R package. So I added that.
Now when I create the project, RStudio is going to open a new project. But in the directory of this project, I have a package structure. In the R folder of this package, I have git password, it's already there. I can open it up. I see it's not very well documented. I'm not sure if I need to export this or not, but I'm going to export this function using Roxygen syntax. I probably shouldn't have done that because I'm not covering what that does. But to make this an add-in, what I need to do is create that special file where I register it as an add-in. And the file needs to exist in a specific place. This is where RStudio ID is going to look for it. It needs to be in a new folder called inst. So I'm going to create that folder. Inside that folder, there needs to be a folder called RStudio. I'm doing this by memory. I'll check to make sure it's correct in a second. I'll check right now. Where's my slides? Inst RStudio add-ins.dcf. Okay. And then inside RStudio, I need to make a file called add-ins. So I'm going to start with a text file here. We're going to save this file as inside inst RStudio add-ins.dcf.
And then I just need to register my get password function here. And if I exit the slide show, the easiest way would just be to copy and paste this code. I'm going to use the name get password2. You'll notice I already have get password in my drop-down menu. So this will just differentiate it. The description just says what this does. It collects a password. The binding is important. It's the name of the function in this package that get password2 add-in should call when someone selects it. So when someone selects get password2, it's going to call this function get password. It's just going to run that function. That function happens to be a shiny gadget. And this function is interactive because it's a gadget, so I'm running true there.
So now I've created a package. This literally is package everything you need for packages here. If I want to build it into a package that I could install, I'll go to build source package in the build menu here. We do have a webinar about making packages in RStudio, by the way, so you can learn all this. This just built a package. It saved it as foo0.1.0.tar.gz on my desktop. Now if I want to install it in my RStudio session, go to install. Instead of installing from CRAN, I'll install from a file. Now I just need to find that file, which is right here. I just made it. All right. So it's installing that package. It's not a very well-documented package, but it's there. And now get password2 is in my add-ins list.
So with that, that's, you know, we created this add-in in like 10 minutes. That's how easy it is to create an add-in. And anyone who gets this package, should I put it on CRAN or wherever, they can instantly have access to those add-ins just by installing the package.
If you want some ideas about building add-ins, there's two packages that contain add-ins. One's called add-in examples. That's on GitHub in the RStudio account. But if you Google for it, you'll find it. One's called hadladdin. Those are some add-ins that Hadley Wickham created. That's on GitHub in his GitHub account. But if you Google hadladdin, you can find it. And then there's a package called rstudio-api. This doesn't contain add-ins, but if you want to get in the business of creating add-ins, this is a package you'll probably want to know about because it provides R functions that allow you to control the RStudio IDE. So you could, for example, open a file or change the text inside of a file using functions in RStudio API. When you combine that with an add-in, that could be a very useful thing to do.
Summary and Q&A
So to conclude, to make a shiny gadget, just remember you need to save it as a function, use package-mini-ui to create the user interface, and then use stop-app along with an observe-event statement to return values back to whatever function called your gadget. So thank you for paying attention. And then the material that I present today is encapsulated in three articles on various RStudio websites. I put them all right here. The first talks about gadgets. The second talks about mini-ui. And the last one talks about creating RStudio add-ins. In addition to these resources, we'll put these slides and recording of the webinar up on our website within 48 hours. So at this point, I will take some questions.
Pop up a question here. So the first question is, can you please describe how gadgets will work with RStudio Connect? I'm assuming it will be identical to the way they work with Shiny.
Well, gadgets are invoked from your code. So a gadget's not going to appear unless, first, someone runs a function or some code runs a function that invokes the gadget, or second, someone goes into the add-in menu and opens an add-in because you've packaged the gadget as an add-in. So if you're using RStudio Connect to run code, then you can expect your gadgets to be invoked as the code's run. But I can't really visualize at the moment how that process would work. RStudio Connect's more designed for communicating things that are already deployed. So that's very much the first Shiny app user case. You deploy the app so you don't really have to manage it. It takes care of itself at the moment someone visits it. With RStudio Connect, that moment will be curated by RStudio Connect sending them the app at a certain time or updating the app and sending it to someone else.
Yeah, I've transferred a gadget and app several times. Easy to do. Well, every gadget, the way I think about it, every Shiny gadget is an app. Not every Shiny app is a gadget. And when you're using functions like stopApp to control your gadget, it becomes very clear that your gadget is an app. So I hope that I was never incorrect, even though I might have been imprecise by transposing gadget and app. I apologize about that, Bernard.
What happens if you use runApp at the bottom instead of runGadget? Do you get a Shiny app instead? That's a good question. I think, especially on educations, you will experience behavior that you want to steer clear of. runGadget gives you the freedom to open your Shiny app as a dialog box or in the pane or the browser, which obviously runApp does as well. But if you're using gadgets, stick with runGadget. There's a reason you create a separate function and you shouldn't try to mix the two.
Hi, I'm new to R. Is the Shiny app gadget only applicable when we use RStudio only or is it part of R language features? Both Shiny and Shiny gadgets are IDE agnostic. They're part of R. You can create them with R without using RStudio IDE and you can give them to people to use even if those people are not using RStudio IDE. Since we make RStudio IDE and we also make Shiny, we've been able to really integrate them well with RStudio. Our hope is that RStudio makes it easier for you to create these things, but you do not need to use RStudio. They're completely disconnected.
How easy fast is it to convert a gadget into a Shiny app if needed? It's very simple. Just unwrap it. Take the UI and server that you create in your function body and define them outside the function body. If you're relying on parameters of the function to supply things, make sure that your UI and server can stand on their own and then just replace runGadget with runApp. What's inside that function is essentially a Shiny app, so it's very easy to take it, move it outside the function and have your Shiny app. Also, it's very easy to do the opposite, to take an existing app and repackage it as a gadget. The things you'll want to look out for, though, is how the layout looks when you go back and forth. By the way, any Shiny app can use the miniUI functions within the app if you think that they're better for your particular app. MiniUI works for all Shiny apps.
Can you comment on a comparison of a Shiny gadget and a Shiny module? That's a good question, because they both are extensions of Shiny in a way. A Shiny gadget is a complete Shiny app. A Shiny module is not a complete Shiny app. It's a part of a Shiny app that's composable. So if you find yourself doing the same thing many times across apps or even within an app, a Shiny module would be a way to write all that code once and then reuse it in multiple places. It's sort of like the function equivalent for Shiny apps. In R, if you