
Introducing Notebooks | RStudio Webinar - 2016
This is a recording of an RStudio webinar. You can subscribe to receive invitations to future webinars at https://www.rstudio.com/resources/web... . We try to host a couple each month with the goal of furthering the R community's understanding of R and RStudio's capabilities. We are always interested in receiving feedback, so please don't hesitate to comment or reach out with a personal message
image: thumbnail.jpg
Transcript#
This transcript was generated automatically and may contain errors.
Like Bill said, my name is Jonathan. I've been at RStudio for about the last three years or so and I'm really excited to show you this because we've been working on it for quite some time now and we are only just now starting to show it to people. One thing you should know before we even spend a lot of time discussing it is that if you want to use R Notebooks and you open up whatever version of RStudio you have installed, the chances are that you'll be disappointed because the current stable version of RStudio does not have Notebooks.
This is a feature that we would consider to be complete, but it is still in development. So if you want to play with Notebooks, you can do it today, but you'll need the preview version of RStudio to do it. So everything that I'm about to show you is available today but only in the RStudio preview.
So let me give you an idea of what we'll be talking about today. We'll be talking about some background concerning Notebooks and data analysis workflows. I'll talk just briefly about Notebooks themselves. We will spend almost all of our time doing a hands-on demo. This is a very interactive feature and we will devote most of our time to showing you exactly how it works. And finally, we will have some time at the end like Bill mentioned for questions and answers.
Data analysis workflows
So let's talk a little bit about data analysis workflows. And by workflows, I mean that the way that you typically engage and interact with R as you're doing your analysis process. If you are a user who is new to R or if you've ever worked with somebody who is just getting started with R, you typically see them using this sort of a workflow. They'll be typing R commands in the console and then looking at the result and the output of the commands and then issuing another command. So they sort of have this ad hoc conversation with R. Enter a command, look at the output, think a little bit, enter another command, look at the output, and so on.
And there's actually nothing wrong with doing R this way. It's really fine for exploratory analysis in the early stages, but it has a very serious drawback which is that it is not reproducible. And this is one of the whole points of using a tool like R to do your data analysis is that you want your analysis to be very reproducible. But when you're just entering ad hoc statements, you're really not leaving much of a record besides your console history of what you did or why you did it or what the output was.
And so most people who have used R for some time have learned that instead of just entering stuff ad hoc at the console most of the time, what you want to use is an R script. This is sort of another level above a regular like R console thing. It's instead of just entering stuff at the console, you're actually forming a script that leaves a record of what you have done. And this has a huge amount of advantages over just entering code ad hoc at the console.
Your analysis is now documented, like you have a record of what you did. It is also now repeatable, which is to say that you can now run the same analysis over and over as you need to. And it's even shareable. You can take this .R file and send it to anybody and say, hey, do you want to do the analysis that I just did? You know, there's no smoke and mirrors. Here's the thing that I did.
So this is actually where many R users stop their exploration. So R scripts, output, done. But if you think about this workflow, it still actually has a lot of room for improvement. For one thing, the R output is disconnected from the input. Your R code, this script produces some output and it's really not connected in any way to the script itself. You have to save the output separately.
Typically, this is not actually the end of the line. The data and the visualizations and the results that are generated from your R code don't end their lives in the R console or in a viewer window in RStudio. They actually end their lives somewhere else in a document or a presentation or some other artifact that you're generating. And so when you need to re-perform your analysis, you have to do this export and copy and paste thing to try to get the results into their final format. And finally, the documentation in an R script is usually somewhat sparse. If you leave comments, that's great. Most people don't. And there's often not a lot of context for why you're doing what you're doing.
Introducing R Markdown
So to solve a lot of these problems, we introduced something a few years back called R Markdown. It borrows heavily from some ideas in literate programming and it's designed to address some of the issues that I just talked about. R Markdown lets you do the same kind of thing you do in an R script, which is that you can write code and have a record of it, but it also allows you to bring together your output and your code in a rendered document so that your document itself and the code are combined.
This solves both of the problems I was talking about earlier. Now you can see your code and your output together. You can actually make your code your final document. They're one in the same artifact. And it is possible to create all kinds of very high quality professional documents from this. And you typically don't need to have another tool that you export this to. This can actually produce your final HTML file or PDF document or Word document or whatever that you need to email out.
Even though this is a very powerful tool and it has received a lot of attention and a lot of accolades, it still has some problems when it comes to interaction. If you look at where we've come from, from all the way from a typical new R analysts, this is appealing because it's simple. By the time we get over to here, yes, it is literate. Yes, it is wonderful to mix your context and your narrative and your code and produce all these wonderful output formats, but something has been lost. This feels easy and fun and this is beginning to get quite complicated.
The R Notebooks philosophy
So, we set out to create a way of interacting with R that gave you a lot of the benefits of the literate programming model and without a lot of the complication that we have in this. So, this is the interaction model for R notebooks. You'll notice this is a very simple way to interact with R. You run some code, you see the output right beneath the code.
Let me talk very generically about notebooks before I spend a bunch of time showing you how they work, just so you can get an idea of the philosophy. We want you to be able to interact with R in kind of a single, seamless stream. What we mean by that is that you don't need to have four or five windows or panes open. You should be able to have a single window open in which you can cohesively interact with R.
We wanted to make it possible for you to iterate quickly in your code and output, which is to say that you should be able to change your code and see the change in output together in one place. Again, not spread out, not in a big batch, but one line of code at a time. You should be able to leave a clean and reproducible record of your analysis in really a simple text file. And by this, again, we mean that as you were doing your data analysis, you're actually creating the final document that you'll be using to communicate and publish your analysis.
And you are also documenting exactly what you did so it can be repeated. You'll be able to document your analysis with rich, literate prose. By this, we mean that you can use all the power of R Markdown, which includes many very high-quality professional layouts and tools for formatting your text. These things can be shared and published easily, and because it's just R Markdown, you can export it to any format that you like very quickly and easily.
Demo: running code in a notebook
So with that, we are going to spend the majority of our time in a demo. Alright, so here is a R Notebook, and at first glance it really looks a lot like an R Markdown document because it is an R Markdown document. However, it actually has a lot of unusual features that differentiate it from an R Markdown document.
So, just to give you an idea of what it's like to run code in the notebook, let me run this chunk of code. Now, I'm going to run it by clicking here on the green button, and you may know if you've used R Markdown before that in an R Markdown document, this green button would actually just send a text to the console, but you'll notice here I don't have a console. I'm just showing you a notebook. So, I'll click this, and you can see here that it ran this chunk. You might have seen a green flash that indicated that the code was sent to R, and it shows me the output right beneath the code.
Now, I can update the output just by updating the code. So, if I want this to be, say, I want to generate the numbers from 1 to 20, there we go. So, this is a very, like think about the way that you had that very first conversation with R where you were entering code and seeing the results immediately. This gets you back to that quick iteration cycle that's really a lot of fun without losing a lot of the benefits of doing things in a much more documented and literate way.
So, a lot of times your output from R is just an object or a number or a single result, but sometimes your notebook chunks or your R code are also going to output graphics. So, here's an example of some code that uses graphics. I'll run that, and you can see that produces a plot again right inside my editor, which makes it very easy for me to tweak attributes of the plot.
So, you can see here you can use textual output, you can use graphical output, and really you can use just about any code that produces output. That output is just going to show up beneath the code. Another type of content that people are starting to use a lot more is HTML widgets. If you haven't played with these, we really recommend that you check them out. They offer you a way to perform interactive graphics right inside RStudio, right inside your documents.
So, here is a chunk that produces an interactive graph. I'm going to run the chunk. You can see that this has actually produced an interactive graph using HTML widgets, and this HTML widget gives me a time series graph that I can easily adjust with a nice sliding window. So, I'm not going to spend a lot of time here on HTML widgets, but just know that most of the time when your code produces output of any kind, that output is going to show up right inside of the notebook, and we support all the major output types that RStudio does.
Running code: execution bar and line-by-line execution
So, we've talked a bit about output types. Let's talk a little bit about what it's like to run code in the notebook. I mentioned earlier that we want this to feel like a single, seamless experience for interacting with R, and that means that anything for which you formally had to reach out for the console pane, we wanted to make sure that you didn't have to do that anymore.
So, one of the things that you need the console pane for is understanding what stuff has been sent to R and what stuff hasn't. So, to address that, we created this little execution bar that you may have seen. I've created this chunk here which simply takes a little while to run by having some sleep statements. Let's run this and see what happens. You can see here that RStudio is drawing this little green bar on the side of the chunk. The light green indicates that code has not been sent to R, and the dark green indicates that it has.
Another thing you should notice here is that I'm actually seeing the results streaming in real time as the code runs. So, you don't have to wait for the whole code to execute in order to see what output it's producing. You can actually watch in real time as statements are pulled out of the queue, sent to R, the results are returned, and you can see the output appearing in real time.
Sometimes, that is going to be sufficient. You'll just want to run one chunk at a time, but sometimes you'll want to run things in a little more ad hoc way. If you want to do that, you can also run portions of a chunk only, and this is one way in which the R Markdown notebooks differ from some other notebook approaches you might have seen. It is completely possible to run any portion of a chunk as though you're running the whole chunk itself.
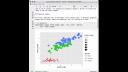
So, here is a chunk that does a couple of different things. It reads a CSV file containing a list of cities and their locations, and then it plots them onto a leaflet map. So, let's run this code just one chunk at a time and see what happens. Sorry, one line at a time. So, I'll just run this line, and you probably saw a green flash there in the gutter as that line was sent to R and returned. Now, I'm going to run just the second line. You'll notice that that now actually printed out the data as I requested, and now I'm going to run this third line here, or this statement, I suppose, and you can see that it runs the statement and then shows me the output for that statement.
Now, you'll notice here that I didn't actually see the results for the entire chunk when I did that. When you run one single line, it treats that single line as though it were the entire chunk. So, if I were to now click this button and run the entire chunk, you can see it does both things now. It reads the CSV file, it prints out the results, and then draws the map for me. So, the idea here is that it should be very easy for you to take one little bit of code, execute it, and see exactly what that one line of code did.
So, the idea here is that it should be very easy for you to take one little bit of code, execute it, and see exactly what that one line of code did.
So, we've talked about what it's like to run – oh, one more thing. This is sort of a small thing, but something that people have asked us for for a while, and we finally took the time to do. You'll notice here that I didn't actually have to select this whole thing and run it, and that is because we now actually detect where your statement begins and ends. When you hit Command-Enter on the Mac, or Control-Enter if you're using a different operating system, we now actually will run the entire statement instead of just one line of the statement, and this is really to prevent you from getting into an awkward situation where R is waiting for you to finish the statement, but you don't know it's waiting because in this mode, you really typically aren't using the console.
Multi-language support
Alright, so we've talked about the different kinds of output you could have inside of a notebook, we've talked about what it's like to run code inside the notebook and interact with R, and again, you should think of this as really a new way to interact with and have a conversation with the R interpreter. But one thing that you might not be aware of is that R Markdown, and really by extension notebooks, has support not only for R code, but also for code written in other languages. So you're not actually just limited to R chunks, you can have code in Bash, or Python, or C++, or a variety of other languages.
Here for instance is a code chunk that is written in Python, this just prints out the Fibonacci sequence, here I'm asking it to print out the first 11 terms, so there's no R here, it's all Python, but I can run it just like any other chunk, and you can see here it actually fired up the Python interpreter and fed this code into it, and then I can see the result right beneath the chunk.
And this also works, here's another example, this also finds a particular term in the Fibonacci sequence using the RCPP engine. So you can see here I'm making an RCPP function, which actually takes a couple of minutes because it needs to compile, then I can use that function here to compute a particular term in the Fibonacci sequence. So the idea here is that a notebook is not just a way to mingle R and your documentation and produce something you can share, it can actually be used to compose a workflow that uses tool chains and systems from really a variety of different languages. So you can use a notebook to create your data analysis workflow in a very language agnostic way, even though R is sort of the host for your system.
Error management
So we've talked a bit about what you can produce and how to run code and the ability to run code in different engines, let's talk a little bit about error management. So sometimes your code is going to generate errors, it is just going to happen. We have built a bunch of error management features into the notebook as well. So here is some code that generates an error. I specified error equals true so this code can run without stopping the notebook, but if I try to run it, you'll see that I get this error here, and this error basically tells me what happened here.
So you'll notice a couple of things happen when we get an error. One is that we color the gutter to tell you which line generated the error. In this case there's really only one line, but in many cases if you have a long multi-line statement it's very helpful to know which of the lines in your code actually generated the error. So I'll highlight that for you. We'll typically show you a trace back of the error which tells you where the error came from. So if I click show trace back here, you can see it tells me you called source, source called file, and when the file tried to open it couldn't find it.
So we hope you'll find that when you encounter errors, again you're not going to need to dig into the console to figure out what line of code generated the error. That information as well as all the information you need to know where the error came from is going to be available to you right inside the notebook.
Running all chunks and saving notebooks
So we've talked quite a lot about what it's like to run code in the notebook and how to do it. We've talked about linewise execution and about running the whole chunk at once. There are also a variety of tools which I'm not going to spend a lot of time on, but you're not typically going to want to just run individual chunks or lines. A lot of times you'll want to bring your whole notebook into a consistent state, and we have built a number of tools for this.
So it is very easy to run just the current chunk or the next one. These commands are very helpful. They will allow you to bring your notebook into a consistent state by running all the chunks that are above or beneath your particular chunk, and when you do this, let me show you how this works. So I'll say run all chunks above and you can see now I'm actually getting a little progress bar at the bottom of the notebook here that shows me what's being run, and then you'll notice here that I am brought right here to where the error is when it's finished.
So there are lots of tools for running your notebook, a lot like you were knitting an R Markdown document, and I'll talk about the difference between running code in a notebook and knitting in just a minute. So I'm going to switch now to RStudio and talk a little bit about how to save and share these things.
So here is RStudio. I'm going to bring my notebook back into RStudio here. You'll notice that when you bring the notebook into RStudio and open it, it will typically maximize the pain so that the console gets out of your way because most of the time you don't need it. It's still there if you do, so you can just open it up here and you can see that when you execute some code inside the notebook, it is actually just sending it directly to the console and you're seeing the result here, but most of the time this is going to be redundant, so you're not going to need to look at it.
Previewing and sharing notebooks
So I promised that we were going to look a little bit at saving and sharing, so let's do that. So if you are familiar with R Markdown, you probably know that when you need to update your document after making a change to your code, you actually need to completely re-render the document. So there's this command at the top called knit, which you can see, like here I have this other document which actually contains my presentation. In order to update my document, I need to knit, which means to re-render the whole thing, re-run all the code chunks and so forth.
In a notebook however, it is not necessary for me to re-run all the code chunks to see the document because if you think about it, I have actually already run these chunks and I already have the output available. So in a notebook, we can actually generate the HTML result without re-running any of your code. All we need to do is render the document part and then put the output that you've already generated into it.
So let me show you what that looks like. So I'll hit preview here, and you'll see that here, let me maximize this to make it a little bit easier to see, so you can see here we have exactly my notebook that I've been working on, and you can see all of my code, there's my sequence, there's my plot, there's my interactive widget, there are all of my random numbers that I really enjoy generating. So all of the output and input that I encountered in my session is right here inside this file, and again, generating this thing is not like generating an R Markdown document where I've got to re-render the whole thing. Whenever I save the notebook, this file is updated.
So for instance, let's say now I want to generate, I don't know, maybe 200 numbers. Now I'll save this, and you can see that it's going to update here with a sequence of 200 numbers right on the side. So every time I update this thing, it's going to update the preview here on the right. So you can see these things are much easier to iterate on than a traditional R Markdown document because the whole step of re-rendering things is gone. It's a much more immediate system where all you have to do is save it, and it will instantly update with the file.
Now it's important to note that this file that I'm viewing right now, this HTML file, it's not only generated when I have it open here. This is actually generated every time you save any notebook. Let me say that one time again because it's important to understand when we later talk about how these things work. Whenever you save any notebook file, we will generate this HTML file for you. This HTML file is basically the way that you can save and share the notebook content.
In some other notebook formats, there's really no separation between your code and your output, like it's all in one file. In our notebooks, this is not the case. You have a very clean R Markdown document that contains just your code, but you also have this file. We call it the nb.html file because we're not very creative and couldn't come up with a cooler name. Anyway, we have this file which contains not only your code, but also a beautiful rendered copy of your document as well as the output. This thing contains your code and your output, and it even contains the source code for the notebook.
If you were to send this file to somebody, here's what they would see. You can see that this is just a nice rendered copy of my notebook with the output that I've created, and if somebody wants to work on this notebook, they can actually download the original RMD file right here. The RMD file is embedded inside the HTML. One wonderful thing about this is that this file that you share with somebody is not in some sort of proprietary format that they're going to need a viewer to open. You can send somebody one of these notebooks, or one of your rendered notebooks, and it's just an HTML file. You can open it in a web browser as I have done right here.
One wonderful thing about this is that this file that you share with somebody is not in some sort of proprietary format that they're going to need a viewer to open. You can send somebody one of these notebooks, or one of your rendered notebooks, and it's just an HTML file.
It is very, very easy to use, and if they want to sort of continue your analysis, it's very easy for them to download the RMD and do that. There's one other really interesting trick that you can do here, for which I will switch back to RStudio.
I just showed you that you can take that HTML file, open it in a web browser, and use that to publish your notebooks. Really, any web host, it's just plain HTML. You can also use this to use this HTML file to share with somebody, not only the code, but also the output. So, to demonstrate that, I am going to do something a little bit risky in this demo, which is actually, I'm going to close this RMD file, and I'm actually going to delete the RMD file. So, here's that demonstration RMD file that I've been working with. I'm just going to delete that file. Alright, it's gone. So now, I no longer have my RMD file. All I have is that notebook HTML file.
So, imagine, for instance, that somebody sent me this HTML file. RStudio, if you open this HTML file in a web browser, you will see what I just showed you, which is a rendered copy of the notebook. However, if you open the HTML file in RStudio, it will actually automatically extract the RMD file, so that I can continue working on your notebook as though it were my own. Let me show you how that works. So, I'm going to click open in editor here, and you can see that it opened up the RMD file, and the RMD file just got created here. So, RStudio automatically took the HTML file, extracted that embedded copy of the notebook's code, and then produced for me this editing experience for the notebook that I just had. So, this HTML file is sort of a magical jack of all trades. You can view it in a web browser, you can open it in RStudio and continue to edit and work on the notebook. It is a great way to bundle up your notebooks and share them with anybody.
Notebooks and R Markdown output formats
So, I mentioned earlier that there's sort of this difference between previewing a notebook and knitting an R Markdown document, and I hope that I didn't give anybody the idea that these are sort of two different worlds and you have to pick one. You can actually use exactly the same document to have a notebook and have a really nice professional R Markdown output. So, you'll notice that in my notebook here, I've actually got two output formats defined. I've said that this thing is an HTML notebook, and I'm using the default options for HTML notebook, but it is also an HTML document, and what this means is that I can preview it like a notebook, but I can very easily also render it like an R Markdown document.
So, let me show you how that works. I'm just going to pull down preview, and I'm going to say knit this thing to HTML. Please ignore that. So, this is going to take a few seconds. You may recall that we have some C++ in here and some sleep statements, and here it is. So, this is also my notebook, as you can see. It's got my 200 numbers in it, it has my plots and my widgets in it. However, this is no longer formatted like a notebook. I've actually rendered it to a publishable format. I've given it a theme and a table of contents.
This example is a HTML document because that's really easy to show inside RStudio, but it doesn't have to be. I could have rendered this to a PDF or to a Word document, or even to a dashboard, or really any of the other formats that R Markdown supports. So, my point is that a notebook should not be thought of as a sort of scratch pad that you use to play with and iterate on ideas, and then when it's time for you to publish, you've got to open it up and create some other document and actually do your publishable output. The notebook actually transitions seamlessly from this simple interaction mechanism right into something that is your production quality output.
The notebook actually transitions seamlessly from this simple interaction mechanism right into something that is your production quality output.
So, not only can every notebook be rendered as a R Markdown document, but any R Markdown document can also be treated as a notebook. Let me show you how that works. So, I'm going to go create here, I could create a notebook, or let's just create a new R Markdown document with the defaults here. So, here's an R Markdown document, it's just a default one in RStudio, and you'll notice here if I run a chunk, I see the results right here below the chunk. Even though this thing is not a notebook, I can iterate on these chunks as though it were.
And at this point, you may actually be wondering, wait a minute here, I don't know if I like that, this is not the way that I prefer to interact with R Markdown. We have thought of that and know that some people will prefer using the console when they're iterating on code inside R Markdown documents, and for this reason, we have built in a switch. So, if you really prefer to use the console instead of having the output appear beneath the chunks as I've shown you today, you can just pull down the net, sorry, this gear here right next to the net, and say I want the chunk output to be in the console for this document. And so now, when I run one of these chunks, it will just show up in the console instead as you are used to.
So, you have a choice. You can use the notebook style interaction model where you can iterate on code and output sort of together in a single window, or if you prefer, you can use the multi-pane approach like you may be used to. You may also be wondering if you have to do this for every document. If you really, really don't like the behavior, it is also possible for you to flip a switch inside the options that will allow you to, there you go, show output in line for all R Markdown documents. Again, this option is only in the preview, and if you don't like the notebook behavior, turn it off, don't create notebooks, and you will have the same R Markdown experience you do today. We believe, though, that most people are not going to want to do this because there's really just so much power and immediacy in this mode.
Creating a new notebook
Finally, I'd sort of be remiss if I didn't spend a little bit of time showing you how to create a new notebook. It's very easy. New, R Notebook, there you go. Really, this thing right here is the key. Anything that has the HTML notebook output format will inherit all the notebook behaviors that I just talked about. You'll get a preview button which allows you to look at the output quickly instead of executing and rendering everything again. It gives you the inline output regardless of any other preferences you have set, and it should be a very easy thing to do. Inserting chunks is quite easy. There's a couple different shortcuts, but it's very easy to add new notebook chunks.
So, that's what it's like to create a notebook. It's very easy to start one, very easy to drop in new chunks and to mingle your documentation and whatever else you'd like to have in your document. So, this ends the demo portion of our webinar.
R Notebooks vs. Jupyter Notebooks
So, here is... All right. So, I'm going to show you how to do this. One thing I wanted to address quickly and directly, some of you know that the Jupyter Notebook also supports R, and you might be wondering how does this stand in relation to the Jupyter Notebook, and the answer is that we're not trying to create something that's identical to the Jupyter Notebook. We've just selected a different set of trade-offs.
So, for one thing, there's a different interaction model. When you're in the Jupyter Notebook model, you have these cells which can be like markdown cells or they can be R cells or Python cells or whatever. In the RStudio model, you're actually interacting with a text file, which gives you a lot of benefits in terms of flexibility, but also means that you have to worry about things like delimiters to tell you where the chunks end and begin. So, again, we're not claiming that one approach is better than the other, but they are two different ways of interacting with the pieces of the Notebook.
In R Notebooks, there's first class support for R, which means that if you are using R, all of your chunks are typically going to be running in R, and there's some support for other kernels. So, like we just showed you, it's possible to have a Python chunk or a Bash chunk, but our implementation of that is somewhat limited. For instance, we can't display graphics that were generated by those things very easily, whereas in Jupyter, it's a lot easier to have first class support for other kernels. Hopefully, we'll be able to improve upon this, but for right now, anything that is not R for us is kind of a second class citizen, whereas they have slightly better support for other languages.
Our plain text format is a bit more minimal to version control. Jupyter Notebooks are mostly just a large kind of JSON blob, and the RStudio Notebooks have the R Markdown file, which is a lot easier to check into version control. You don't need a special viewer because they render as HTML, and again, like I just showed you, it is possible to take your notebook and sort of cross-render it to a publishable format. It's a little bit harder to do with the Jupyter Notebooks. There are a bunch of other differences. I won't go into all of them, but that's kind of an overview that might help you decide sort of which one to use if you're conflicted.
Additional features and Q&A
A couple things that I didn't talk about, but I just want you to be aware exist. There are different ways to control the execution of a view, so for instance, if you have, like if you're waiting for several chunks to run, you can remove and insert chunks to run later. I didn't really talk about Notebooks in RStudio Server, but they are fully supported. In fact, we now have a feature where you can start your notebook running and close the browser, leave it running for however long it takes, then open the browser and come back. So Notebooks pair great with RStudio Server and are a great way for you to do your analysis using nothing more than a web browser.
All of the features of Notebooks work very well inside RStudio Server. In fact, we used RStudio Server to develop almost all of the Notebook features. Version control, which files check into and out of source control. Obviously, you have an HTML file that's quite large, it contains everything in the Notebook, and then a smaller R Markdown file that contains just the code. There are some best practices there. Our website has more information. And finally, rendering and hooks from other R frontends. And by that, we just mean that it is possible. RStudio doesn't have to be the only thing that reads or writes these things. We've made the format open source. Anyone can build a frontend.
So I'm just putting this slide up again so that you can recall the philosophy of Notebooks. You can interact with R seamlessly, you're going to iterate quickly, you're going to leave a very clean and reproducible record of what you've done. You can document it with lots of context using really rich formatting tools. You can share them, you can publish them, you can export them to other formats. We think that they're going to be very helpful.
So we're right at about 45 minutes, so I want to leave lots of time for questions. These are two links that may be helpful for you. One is a link to the RStudio preview, or if you just Google RStudio preview, you'll find it. The preview release is required to use Notebooks, so don't send me an email saying I can't find the Notebook feature, it's because you're not using the preview. And then here's a link to some documentation that we've written on the Notebook feature.
So with that, I am going to move to the questions and answers. So one person said, what is the RStudio preview edition? So the preview edition is simply, I'll just Google the RStudio. Here it is. It's a version of RStudio that is not necessarily stable. It is somewhat stable. You can use it for your day-to-day work, but we primarily publish it so that people are able to try our new features before we unleash them on everybody.
So somebody asked, when will this be released? So the answer is as soon as it is ready. It will not be too long. I can't give you an exact timeline, but we are wrapping up this release and it will come out soon.
So here's an interesting one. So one person asked, does our Notebook work with Perl? The answer is yes, it does. Perl is one of the alternate engines. So you can have a Perl chunk just like you can have an R chunk. Somebody asked, what languages are included in SQL? Funny you should ask. We are actually, we are working on this very thing. It is not ready yet, but before too long, you will be able to have a SQL chunk as well as an R chunk.
Somebody asked, how does the Notebook interact with version control? For instance, the Jupyter Notebook does not play nice version control systems. Yes, so the way to think about this is that the Jupyter Notebook is a single file notebook. All of your code, all of your output, and configuration just lives in this one single notebook file. In RStudio, we have a two file system. So there is one file which is just the R Markdown file, it's plain text, and that contains all of your code. There's a second file which is the HTML file that I was showing you over here, and this thing has, this is a rendered copy which has an embedded, the rendered notebook which has an embedded copy of your code.
So if you want to use version control and you don't want noisy diffs, you can check in just your code to version control, and this is what we recommend for most cases, and what that means is that if somebody else opens up your notebook from the version control system, they won't see any of the code, the output from the code that you've run, they'll just see the code itself and they can run it for themselves. If you want to, you can also check in the second file so that everybody also sees all the same output, but then you're going to have some noisy diffs, and like I mentioned earlier, we are probably going to be improving the diffing system inside RStudio itself to make that a little bit easier, but for the most part, if you don't want noisy diffs, you just want to check in the code, not the output HTML file.
Oh, here's a very good question. When you render a notebook, is the analysis performed in a separate environment as it currently is with NIDAR? And the answer is, no, it is not, and that's a really good question because it's important to understand for the execution model. When you run code in the notebook, it's actually executed in your current R session. It is not executed in some sort of separate session that can't see any variables. I'll give you a quick demo to show you how this works and help you understand it.
So, here's my notebook again. So, let's say, let's go open up the console. So, I'm going to go open up the console in my notebook, and I'm going to create something called a variable called x. I'll give that the value, I don't know, 25 and 53. Those are good numbers. So now, if I add a new chunk in here, and I just print out the value of x, you can see there it is. So, this is actually happening in the same R session as your console. You can think of running notebook code as running it right at the console. It's very similar.
So, somebody asked, is notebook compatible with any type of interactive graph? The answer is yes, it is. In fact, here is an interactive graph. It is very easy to use interactive graphs. Any HTML widget is supported, not just this particular one.
So, somebody asked, can I use this on shinyapps.io? This is a good question because the answer is that you currently can't. So, shinyapps.io is only for, it's only for shiny applications, and notebooks are not shiny applications. There are markdown files, and they're not even shiny markdown files, they're just regular, no server required, static HTML files. So, those can be published to RPUBs, or they can also be published to really anything that supports static HTML.
Somebody asked, what happens to interactive graphics when you share the notebook output? So, if you have used shiny documents or shiny, you know that if you have interactivity, then you're typically going to need a server to run to drive the interactivity. And so, you might rightly ask, if I have a notebook that has one of these interactive widgets in it, what's going to happen if I go to share that with somebody? And the answer is that it's going to work just fine, and the reason is that the only kind of interactivity that is currently supported inside notebooks is HTML widgets, and those don't need a server. They run entirely off code and data that is embedded inside the HTML. So, unless you're publishing to a format that inherently does not support interactivity, such as a PDF or Word document, the interactivity is actually going to work just fine.
Somebody asked, can you enter tech-like equations, etc., into the notebook? That is a good question. The answer is, it's not incredibly easy to do right now, but that is something that we are currently working on.
So, somebody asked, can we use our Shiny server to host notebooks? And the answer to that is, not really, and there's really no need to do it because notebooks are not Shiny, so you don't need Shiny server. You can use whatever web browser, whatever web, whatever host you want.
Alright, somebody said, how can I save a plot from the notebook? I right click the mouse on the figure to save, but I don't know where it goes. So, if you want to save just one plot from the notebook, I would say don't, there's really no need to use notebooks at all. You can right click and download the thing if you really want to, but like you mentioned, it doesn't go anywhere useful. So, what I would do there is actually just take the code, run it at the console, and then you can export that as an image, however you like. So, the notebook is not designed to support this sort of workflow where you're putting stuff elsewhere on the file system. If you want to take just one piece and export it, I would recommend just running that one piece at the console, and fortunately because the notebook works inside your main environment, you can actually get all of your data set up to run that line of code using your notebook, and then you can run just that line outside the notebook to generate the plot.
So, somebody asked, how easy is it to insert external graphics into the notebook? The answer to that question is it is possible to insert them into the rendered notebook. For instance, it's just markdown, so you can just… So, all you need to do is reference the external image as you usually would, like so, but you're not actually going to see the image inside it until you do the preview. It is easy to have an external image in the notebook, but you're not actually going to see it in the editor today. That's something that we may improve in the future.
What are your suggestions for creating notebooks which will need to be updated regularly, for instance, downloading uploaded data? So, like I said, the notebook is just a static HTML file. However, one thing that you may not be aware of is that it is actually possible to render one of these things, not just using that preview click inside RStudio, you could actually do it from the R console via R Markdown Render. So, you can do R Markdown Render, and you can give it the path to your notebook file, and it will render the notebook just as though you'd rendered it inside the RStudio IDE. So, you don't really need to use RStudio to render one of these things. So, if you want to actually have a notebook that updates automatically as time goes on, you basically want to create a script that runs R Markdown Render and then put that script into some sort of like a cron job. We are developing a product that will allow you to do this very easily through a web interface as well.