
Connect Basics | RStudio Webinar - 2017
This is a recording of an RStudio webinar. You can subscribe to receive invitations to future webinars at https://www.rstudio.com/resources/webinars/ . We try to host a couple each month with the goal of furthering the R community's understanding of R and RStudio's capabilities. We are always interested in receiving feedback, so please don't hesitate to comment or reach out with a personal message
image: thumbnail.jpg
Transcript#
This transcript was generated automatically and may contain errors.
So thank you again for being here. I'm excited to talk to you today about kind of the basics of the RStudio Connect internals and sort of what's going on behind the scenes in the server and how you can manage and interact with it.
So we're going to cover a few different topics today. So we'll start with just a basic introduction to what is RStudio Connect, so if you're unfamiliar or that you're new to this product, then we'll cover that briefly. Secondly, we'll talk about installation and setup and kind of what you need to do and things that you need to be aware of in order to configure the product. And then lastly, we'll dive a little bit deeper into a few different areas on some details about how the product works and some nuances that you should be aware of.
As Anne mentioned, we will be doing a follow-on webinar to this one in a couple of weeks, and in that webinar, we'll actually go into a lot more detail on this third section around more details and some more things that you should be aware of if you want to manage this product in a production environment. And then we'll conclude with a demo of the product so that if you haven't seen it yet, you'll have an opportunity to get a feel for what it does.
What is RStudio Connect
So RStudio Connect is an enterprise publishing and management platform. It can handle static and dynamic content, basically anything that you can create with R, including documents, presentations, dashboards, and Shiny applications. And so one of the nice things about this is that it has push-button publishing from the RStudio IDE.
And so if you're using a recent version of the IDE, you'll see this little publish button that you see here at the top right. You should be able to click that and click Publish to RStudio Connect, and if you register an account on an RStudio Connect server, you'll be able to seamlessly publish documents and R Markdown documents and Shiny applications and anything else that you're producing in the IDE into Connect.
It is an on-premises enterprise product, so this is not an open-source product, but it is something that you can install behind your firewall, and it's not a hosted environment. And lastly, it obviously is meant for sharing data science artifacts within your organization.
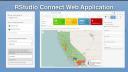
So this is a sneak peek of what most of your users are going to see when they look at RStudio Connect. So on the right here, this is the full panel, and you can see the majority of the space is taken up on this lower left here by the Shiny application. This is what your users or you would be creating to share within your organization.
Up at the top, you can see we have kind of a settings toolbar and some management there of the content, and then over on the right, you've got your settings panel, which is where you can manage, in this case, the performance of the Shiny application. You can see another screenshot separately on the left here of what it looks like to manage the access controls of different content on the server as well.
So this is one of the key features of Connect, is that you're going to be able to go in, search directly from the IDE, and now you have this web interface to be able to go in and navigate and manage your content and set who should be able to see it and who shouldn't.
Installation and setup
So in order to get started with RStudio Connect, you're first just going to want to download and install it. So you can download it from this link here, or you can find it on our website, a similar link that will let you register and download.
Before you get started with Connect, you will need to install R, and depending on which distribution you're using, you can either do that from your package manager, most have R, or if you're looking for a particular version of R, you can compile it from source. And then, lastly, Connect is made available as either a Debian or an RPM installer file. So the installation should be pretty seamless. You should just be able to, on any of the listed distributions here, Ubuntu 12.14.16 or Red Hat or CentOS 6 and 7, you should just be able to run a command or two to be able to get Connect and any dependencies that we have up and running on your server. So at that point, you should actually have Connect installed, and it should be no more difficult than that.
Configuring the server
But one of the first things that you're going to want to do is go in and start configuring the server. And so you can see here an example on the right of what a configuration file looks like, and so these are just some of the basic settings that you might be interested in managing on the server.
And so at the top here, you can see you've got your sender email, that's the email address from which you'll be sending any outgoing email on the server will be sent. You've got your address, which is the URL where users should expect to come back to your server. And then you've got basic settings here around, you know, which ports do you want to be listening on. If you want to use SSL, you can set up your certificate and your key, and then you can also configure authentication.